Home Kitchen

Stainless Steel Welding – How to Weld 303 Stainless Steel Free Machining

Stainless steel welding is a sauce. Well, at least most of the time that is.

Here’s a story about a certain type of stainless steel that isn’t so easy to weld.

“Hey John, you can handle TIG welding 303 stainless steel, right?”

That’s the question the machine shop owner asked him right after notifying him that his weld shop won the contract that pays $18,000 to weld 4,000 spindles made of 303 stainless steel.

And by the way, the parts are already machined and on a truck on the way to your weld shop.

You ignore the 303 stainless steel comment because you know that stainless steel is a piece of cake to weld…

Their welders are certified. They are artisans. They take pride in their work. there is no problem

On the day the parts arrive on a pallet, your welders are drooling from all the heavy lifting they’re about to do. Their welders love stainless steel and the quality they produce is nothing short of a work of art.

“This stainless steel welds like crap! I think I have some bad argon!” says the best welder of him as he raises the hood after welding the first of 4000 spindles.

“It’s undermining, and it’s just soldering poorly. Something is definitely wrong.”

You swallow hard. Your stomach sinks.

You are committed to doing the job. You urgently need the money and you want to impress the owner of the auto shop to keep sending you work.

So this is what you do…

Follow these tips for welding 303 stainless steel and things won’t be too bad.

  1. Use 308L filler rod
  2. use only enough amperage to do the welding
  3. add a bit more filler metal than you would on 304 stainless steel
  4. maintain a tight arc to avoid undercuts
  5. reduce amperage slowly if tig welding to avoid crater cracking
Home Kitchen

Choosing door handles – it’s up to you

You may be surprised at the number of options available for door handles these days. Not only that, you might be surprised how seriously people take the decision to replace doorknobs for whatever reason. No matter what your reasons are for choosing new door knobs for your home, it’s nice to know that there is so much variety available now. It’s good to know that there are many options available to reflect your personal taste. Just look at all the possibilities!

Round, Rectangular, or Other: You’re no longer limited to traditional round door knobs, oh no! Now you can shop a wide selection of designer handles. Today you can choose long thin rectangular door handles or you can choose those wide wide industrial looking door handles or yes you can even choose a traditional round door knob if you want but place it in the center of your door in the hobbit style. You can even choose curved and quite elegant handles for your doors. Everything depends on you!

If the different shapes to choose from are not enough to show your true taste, you also have a choice of materials for the door handles: the designer handles are available in stainless steel and bronze! If you want something more rustic and subtle, you can opt for bronze handles on your doors. If, on the other hand, you prefer your home to really stand out from the crowd, you may prefer stainless steel door handles that shine bright and shine in the sun. Again, it’s all up to you!

And, as if all those options weren’t enough, both the bronze door handles and the stainless steel door handles are available in several finishes for you to choose from. Both varieties are available in matte or gloss finishes. Stainless steel can be finished in a variety of colors: white, black, gunmetal gray, and more. Bronze can be finished with different levels of the golden copper hue that bronze is known for. Both can be styled to have a wonderful texture. Again, the choice is yours and you may be pleasantly surprised at the variety of designer handles you have to choose from when you look around.

Aesthetics aside, bronze door handles and stainless steel door handles are remarkably strong and easy to care for. Because bronze and stainless steel are alloys, they’re incredibly strong, which means they’re hard to dent, dent, or scratch no matter what you do to them. It also means that a soft, dry cloth is the only equipment needed to keep your designer handles polished and sparkling clean.

Home Kitchen

Replace your kitchen cabinets

If you’re looking to update your kitchen, the most striking change you can make is to install new cabinets. There is a wide selection of cabinet styles and colors to choose from and a number of options on how to outfit the drawers. New cabinets will not only improve the look of your kitchen, but you’ll also have more storage space than ever before and added convenience that will make preparing dinner that much more fun.

There are three basic options when considering the purchase of new kitchen cabinets. Cabinets in stock, semi-custom cabinets and custom cabinets. Regular cabinets are the most reasonably priced and are what you’ll find at any home improvement store. Just enter the dimensions of your kitchen, and the store clerk can put together a computer layout of how to reconfigure your space. Store cabinets come in standard shapes and sizes and the clerk can help you manage your space. Since the width of the cabinets may not match the exact size of your room, you may need special spacers to fill in the gaps.

Semi-custom cabinets are another option, but they will be more expensive than standard cabinets. These are cabinets that are specially configured at a design store just to fit your room. These cabinets give you a number of different design options and are typically made from a finer grade of wood and the craftsmanship is a step up from standard cabinets. Custom cabinets go one step further and offer the option of different cabinet-to-cabinet transitions and will result in less wasted under-counter space. By choosing the custom or semi-custom cabinets, you can add a nice food pantry without trying to stack storage cabinets on top of each other.

Once you’ve decided on the type of cabinets, it’s time to figure out how many you’ll need and what type of cabinets you want. A mix of glass top panels with traditional wooden doors will add a very elegant effect. Under-counter cabinets need to be functional and attractive, so choose those that offer the most storage capacity. There are a wide variety of options that weren’t available when today’s kitchen cabinets were made, so be sure to take advantage of pull-out drawers and storage baskets. They make organizing the kitchen so much easier.

Cabinet drawers can also be configured in a number of different ways. The special inserts are not available for cutlery, but also for organizing utensils and recipes. Creative designers have devised unique ways to meet all the special demands of kitchen work. Ask about special bookcases for cookbooks and wine racks, they’ll not only make your kitchen work better, they’ll add a touch of style. Wine glass and plate racks can also be installed directly into your cabinet space, making entertaining more convenient.

Home Kitchen

Pebble tiles: main advantages!

Pebble Tiles are decorative natural tiles made from hand-picked and sorted pebbles from the Indonesian island of Bali. This material beautifies floors and walls alike with its rich texture and decorative appearance. These elegant looking mosaic stones are made from polished pebble stones that are suitable for use in any room.

This is exceptionally good for bathrooms and kitchens to use as floors, backsplashes and sink bases and in commercial areas such as swimming pools and around fountains to give a natural decorative look. Standing pebble tiles are made by cutting stones into halves and affixing them to the tiles to give a vertical looking tile. This reflects the colors of the pebbles in a unique way adding beauty to its appearance.

After being carefully hand-picked, almost sixty stones are set together on a mesh back. Although the individual tiles have jagged edges, the tiles fit perfectly on all four sides when laid on the floor. Pebble tiles are inexpensive and can be easily used indoors and outdoors. Floor installation is made easy with the do-it-yourself method, simply laying each tile next to each other, creating an interlocking with continuous edges and a mosaic finish.

Larger, rounder pebbles can be used on a patio floor, for example, while small pebbles with a flat surface are typically used as backsplashes and borders on bathroom floors, walls, and in the dining area. from the kitchen. The utility of pebble tiles is endless. They are used around the shower base, floor and wall, bar feet, kitchen backsplash, near the fireplace, pool and for countertops.

Pebble mosaics are becoming more and more popular these days as a solution to decorate any internal or external surface – they provide endless and creative design ideas, do not require special technical or professional skills for installation and all that at a low cost.

Home Kitchen

Expert Tips: Choosing Paint Colors for Interior Walls

There is something magical about painting your house. First of all, it is incredibly cheap. You can almost completely transform the way guests feel when they walk through your front door for an investment of less than $100 in paint and necessary materials.

And secondly, the paint is powerful. When you choose the right color, you make everything in your home sing. But that’s the hard part. Choosing paint colors for interior walls is difficult, and often feels like you’re flying blind in front of a plethora of swatches at the hardware store.

To help you make the best decision for your home, here’s a guide to choosing interior wall paint colors in different rooms.

Oh, one final note: different houses open up to different rooms. Keep this in mind when choosing paint colors for interior walls. Regardless of which room your visitors enter for the first time, you want it to be bold and beautiful without going overboard. That room is usually the living room, so that’s where we’ll start, but pay more attention to the first impression room in your home.

Living room

What matters when choosing a paint color for your living room? Start with these three things:

  1. Natural light

  2. furniture color

  3. Spacing

If your room is filled with natural light, you can get away with more earthy tones that add a dark complement to the sunbeams pouring through the windows during the day. If you have almost no natural light, look for something lighter.

Also, use your living room paint to balance it out with your furniture. You want your living room to include one primary color and two accent colors. For example, you can have a big, bold rug that creates the primary color. Then use your furniture and walls as accents. Or, you can have a beautiful painting above your mantel that makes a nice accent. Then you can use the furniture as another accent and the wall paint as your main color. No matter how you divide things up, balance is key.

Also, consider the spacing. A lighter paint color can make a small, cramped living room seem larger. You definitely don’t want a cramped living room with little natural light to also feature dark, earthy paint colors.
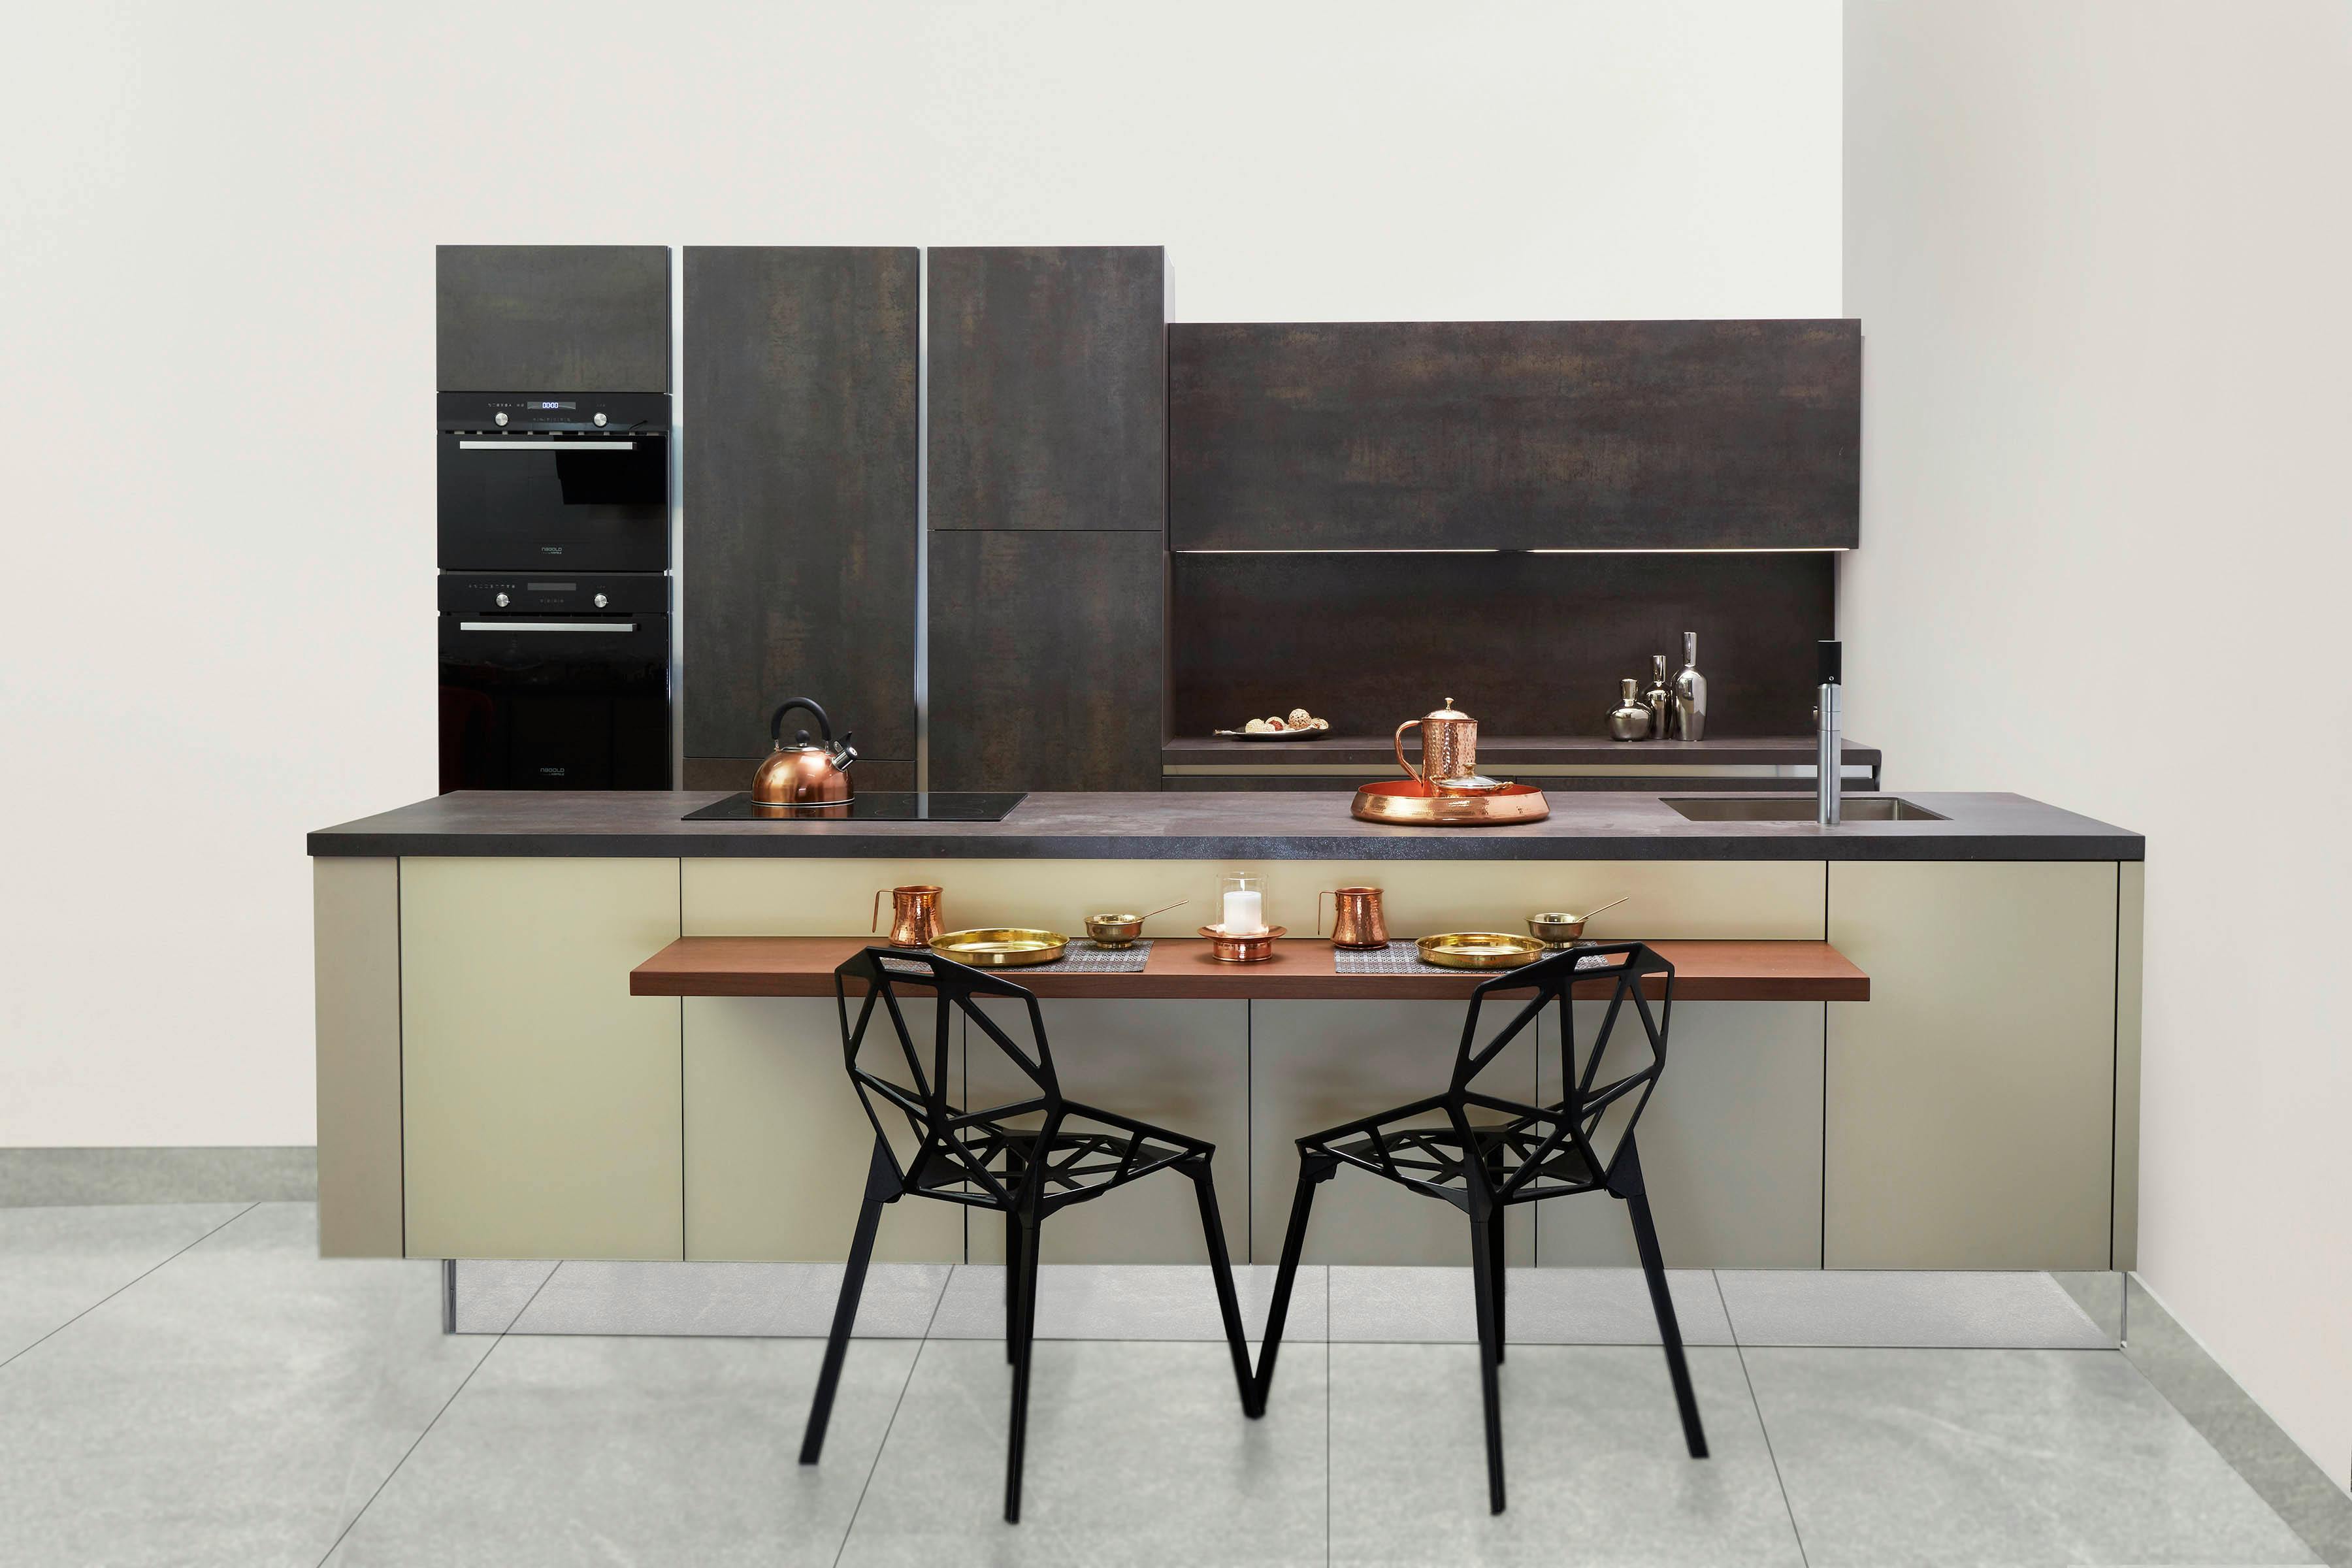
Kitchen

You have many opportunities to provide splashes of color in your kitchen: wall hangings, curtains, tea towels, granite, and even a fun mixer. That’s why I usually prefer a nice neutral gray for my kitchen. (I’ve always had a crush on Dorian Gray, but that’s just me.) Find the right gray and you’ll have a nice palette to add fun pops of color to.

Not in neutral? Well, that’s totally understandable. Bolder options for the kitchen might include yellow, green, or blue. Green is quite versatile when paired with brighter accent colors, and yellow is like bringing sunshine into your home. Blue is good if your kitchen is filled with neutral tea towels, granite, curtains, etc.

Looking to be really bold in the kitchen? Pass the paint on and be part of the return of wallpaper. I’m not quite there yet, but…

bedroom

If you’re like me, you don’t do much in the bedroom other than read a book, get ready for work, and rest. (Okay, there’s the other thing, too, but let’s stay on topic.) With that in mind, make your bedroom the perfect place to rest by using calming and relaxing paint colors.

What colors are calming and relaxing? Try lavender, a soft green, or an icy blue. I know many homeowners can’t help but put a bolder stamp on their walls. If you’re tempted to go for a stronger bedroom color, do it in a guest room or a child’s room. These are the perfect space to be a little more adventurous.

bath

Bathrooms often have little to no natural light. If anything, you might have a frosted window, but most bathrooms don’t have windows.

With that in mind, go to the hardware store and buy lighter colors in the blue-gray family – this is the best range for bathroom colors. Take the samples home and place them on the floor to see how they work with lighting and your tile, hardwood or vinyl floor.

I have used this method in the past, and a sample has always caught my eye. I wish you the same success! But then again, along with the kitchen, the bathroom is another place where you can get away with trying some fun wallpaper, especially a half bathroom.

Final Thoughts on Choosing Interior Wall Paint Colors

I say it many times, but: rules are meant to be broken. Throw everything I’ve written here out the window if it leads you to paint colors you just don’t like. Always stay true to your personal taste, and you won’t go wrong.

Home Kitchen

Low cost kitchen remodel with cabinet knobs

“Inexpensive” isn’t usually the word you think you see in the same sentence with “kitchen remodel,” unless there’s a “no” somewhere, but you’ll be surprised to learn that it’s actually possible to give your kitchen a big makeover. image without breaking the bank in the process. Naturally, it won’t mean all new stainless steel kitchen appliances and shiny new hardwood floors, but you can get a great new look for your kitchen that gives it the feel of a whole new room and still do it on the cheap.

One of the best ways to do this is with cabinet knobs. Think about it for a moment: your kitchen cabinets take up a lot of kitchen space. They are one of the biggest features and therefore one of the things that attract attention every time you walk into the room. When the cabinets look good, the rest of the room looks good, even if you haven’t painted in a decade and can’t afford new linoleum. To update your kitchen cabinets and update the entire room at the same time, all you need to do is swap out your current cabinet knobs for a new set. Sounds too easy, and it really is: Cabinet knobs and handles are inexpensive, easy to install, and will change the entire face of your cabinets without you having to do a thing.

It doesn’t matter how the current decoration of your kitchen is. You can find new cabinet hardware that fits perfectly and brightens up the whole place. For a modern, modern look, try chrome or stainless steel knobs and pulls. They are easy to clean and have a sleek, modern look. They are also appropriate for contemporary style kitchens. If you have a more complicated or themed kitchen, such as a French country kitchen or Shaker-style kitchen, then more decorative knobs are called for. For French Country, choose wrought iron or wood, and for the Shaker kitchen, brass handles and other hardware fit the bill.

If you want to repaint or stain your kitchen cabinets when you change the hardware, you can definitely do that and get an even newer look, but for people on a really tight budget who still want a change, remodeling kitchens with new knobs cabinet is the way to go.

Home Kitchen

Springs for garage doors, the danger zone

Usually the biggest mechanical item in your house is the overhead garage door, which you drive your car through, sometimes without even opening it, I know you do :-).

The main and most dangerous component of the overhead door is the garage door spring (or springs depending on the design), which supports the full weight of the door panels (sometimes more than 400 pounds) and helps it lift / lower the complete door assembly. I have personally installed 3 overhead garage doors with 2 different types of springs, and you have to trust me on that – garage door springs are under enormous stress and you can be seriously injured or even killed doing such work. If you decide to take a risk, it is imperative that you follow the instructions down to the last detail! Even if you have a friend or a professional do it for you, read it and double check everything after the installer finishes the job. Overhead garage doors don’t have safety brakes (at least I haven’t heard of one), that would prevent it from falling over when the support spring fails. I found a few US patents for such devices, but apparently none of them were implemented on an actual garage door.

According to the US Consumer Product Safety Commission, accidents involving overhead garage doors account for thousands of injuries each year (average 30,000 per year). For example, these injuries are: fractures, crushes, and amputations. It is believed that not all injuries are reported in the United States. (CPSC)

There are basically two types of garage door spring systems that use track/side rails (at least these are the most common types in Illinois and probably the rest of the US):

1. Garage door torsion spring(s) wound on a rod above the top section of the garage door opening (door head)

2. garage door extension springs that attach to both sides of the door and stretch along the horizontal portion of the track when the door is closed

You may also have an old one-piece door that swings out as it goes up and up. This particular design will have springs mounted to the sides of the door opening, approximately waist high, secured to a lever bracket system that extends the springs toward the ceiling when the door is closed. It is an old and extremely dangerous system, which is no longer manufactured. If you have such a system in the garage, I recommend that you replace it.

Garage Door Torsion Springs: There are single or double spring designs. Typically the spring will break while under maximum tension, which is when the overhead garage door is closing/rolling down, or is already fully closed (NORMALLY). If you are closing it manually and it happens during this operation, don’t try to prevent it from squashing, let go… well unless your foot is where the door will close!

When one of the two garage door springs breaks, you need to replace them at the same time! It will cost some extra money, but having an old spring and a new one installed:

– put much more emphasis on the new

– the door will lose its proper balance

– most likely the remaining old garage door spring will break soon

Residential overhead garage door torsion springs have a 5,000 to 30,000 cycle life. Those digits represent an average total number of times you should be able to open and close the door before anticipating garage door spring replacement.

Garage Door Extension Springs – You may have one or two on each side of your overhead garage door – the spring is free to slide on this cable! When a garage door spring breaks without the cable inside, the broken ends can seriously injure anyone within their reach. Cables should always be included with overhead garage door hardware (assuming they come equipped with extension springs), but MANY PEOPLE forget to install them or don’t read the instructions and perhaps assume they aren’t necessary. Unlike the torsion spring, which doesn’t actually show any visual wear until it breaks, extension spring wear is much easier to spot, because they simply change dimension – the coils are overstretched (they look best when the garage door is open). If you notice such behavior in your garage door springs, it’s time to replace them.

And for both types of garage door springs, their tension must be adjusted evenly (in a two-spring system) in order for the overhead door to ride correctly on its rails; to test it, stop the door slightly above the garage floor (1″ or two). ) and make sure its bottom/top edge is perfectly horizontal. Measuring the gap along the bottom might not be the best way to confirm as garage floors are often uneven Placing a level somewhere in the center section of the top edge of the garage door will give you the best reading (remember the door should not be closed all the way! ) this level without any help (garage door opener arm is disconnected).

Important things to remember:

1. Check overhead garage door rollers/hinges, cables and springs for smoothing to ensure they are in good working order

2. Educate your kids on garage door safety

3. Never leave children and disabled people alone near or in the path of the garage door

4. Keep your body out of the way of the door when closing

5. Do not leave personal property under an open garage door

6. Read more about the garage door opener and other garage components

Home Kitchen

Kitchen Design Tips and Updates: Space Requirements and Recommendations

Kitchen design can be as simple as a straight countertop with minimalist appliances, or as sophisticated as multiple sinks, dishwashers, stoves and ovens on islands, under islands, above islands and more. Wine coolers can fit in the space of a dishwasher or be as tall as a pantry. Sinks can be ice-filled troughs to chill bottles, small ones for an entertainment center, double or triple bowls, and an endless variety of materials. Materials vary wildly, you can go green with countertops made from compressed recycled paper, clear glass, concrete, granite, limestone, or the good old standbys. Even within materials, such as granite, prices vary wildly depending on the exact stone chosen, and you can find some very reasonable and beautiful stone if you look around. There is an infinite world of possibilities in the kitchen.

First we can start with some design basics. How much space do I need for a kitchen? Well that depends on what you want in it. At its smallest, you could fit a kitchen into a 5′-4″ x 7′-5″ space, but there wouldn’t be much more than a few very small appliances without a dishwasher. Let’s look at some size ranges of standard appliances and accessories.

  • sinkholes: Sinks come in many sizes, depths, materials, and prices. You can get them as narrow as 11″ wide, but you’ll probably want to plan for a cabinet that’s at least 30″ – 36″, which can accommodate a wide range of 25″ to 33″ standard size kitchen sinks in a variety of styles. (recessed, undercounter, or exposed front cutout) You will also need to decide if you prefer a single, double, or triple basin sink, as that will affect the sizes available. There is also the option of placing the sink on an island, or by placing a entertainment sink or a channel sink in a secondary location.
  • Dishwasher: Dishwashers are pretty easy because they’re pretty standard 24″.
  • Cooking: again we have multiple options, but the sizes are a little easier. You can choose between a freestanding or slide-out unit, in which the unit fits between two cabinets, which are typically 30″ wide; a range with separate ovens (either below or in a separate cabinet), which comes standard on sizes 30″ or 36″ and will fit in cabinets that size (although you can get professional-style kitchen countertops up to 48″); or a professional style range made by companies like Viking, Wolfe or GE Monogram that range from 24″ to 60″, and require significant ventilation. If you choose a separate oven in some type of wall oven arrangement, standard oven widths are generally 27″ and 30″, although up to 36″ can be found.
  • Refrigerators: Elections, elections! Refrigerators are sort of two basic style decisions. Do you want one that is shallow (about 2′) and is known as built-in or counter-depth, or do you want the slightly deeper traditional style where some of the sides of the refrigerator are exposed? Shallower recesses generally come in 36″, 42″ and 48″, while deeper styles can be found just under 30″ wide and up.
  • faucets: Kitchen faucets, in addition to an almost endless variety of styles, materials, and colors, have also evolved. Faucets are now available just for filling pots on your stove, you have a choice of pull-out spray heads or separate sprays, single or multiple handles, are available with two-button remotes for a prep sink allowing for quick sink rinsing or a more thorough cleaning flow, and can fit into any decor, from ultra-modern to renaissance.

How much countertop is enough? According to the National Kitchen and Bath Association (NKBA), a total of 158 inches (13′-2″) of counter front (not in the corners) is needed to accommodate all uses of the counter. Try to leave a continuous section of countertop that is at least 36 inches wide by 24 inches deep next to your main work area The NKBA recommends that you leave at least a 15-inch countertop area next to your oven and on the handle side of your refrigerator.

When it comes to storage, the NKBA recommends a total shelf/drawer front of 1,400 inches for a small kitchen (less than 150 square feet), 1,700 inches for a medium kitchen (151 to 350 square feet), and 2,000 inches for a kitchen. large (over 350 square feet). What does this mean? Does this mean I need more than 100′ of shelving for a small kitchen? Well yes, but each individual drawer or shelf must be counted towards the total. So if you have a 24″ wide, 30″ tall cabinet with 3 shelves, you already have 6′ of shelves. And if there was a 24″ base cabinet with 4 drawers, there’s another 8′, so this 24″ area of ​​your kitchen already has 14′ of shelves.

What is “the work triangle”? The work triangle represents the three large work stations in the kitchen: the cooking area, the fridge and the sink. Measuring from the center of each, the maximum total length of the triangle must not be more than 26 feet with the maximum leg not more than 9 feet and the minimum not less than 4 feet. In 3D Home Decorator, there are actually 9-foot and 4-foot arrows that you can place on your floor plans to test distances.

Eating areas are not limited to tables! Islands can accommodate eating areas, cooking areas, laundry areas, or simply prep areas. A typical kitchen counter is between 34 and 36 inches high. A table is typically 30 inches high. Therefore, when planning kitchen eating areas, part of an island eating area can be dropped at table height or a table can be built as an extension to an island, left at counter height with bar stools or raise it to 42 inches for a high counter eating area. , which is often used to hide the counter work surface behind it when viewed from the rest of the room.

How much space is ideal between a table and the wall? The NKBA (National Kitchen and Bath Association) recommends a minimum of 32 inches if no passing traffic is necessary. 36 inches will allow someone to walk through, and 44 inches will allow a person to walk through. If you need to pass a wheelchair, allow 60 inches.

If possible, it’s best to vent your stove to the outside, but there are recirculation fans that will draw odors out of the air if outside ventilation isn’t available. Do not place cooking surfaces below operable windows. If you’re lucky enough to have an operable window above counter height in your kitchen, place the sink below it instead of the stove. You can put a microwave with a fan combination on your stove, either vented or recirculated.

Don’t waste the corners of your kitchen. Upper cabinets can be decorative open shelves or have a two-part door that opens on both sides of the cabinets. Blind base cabinets may have lazy susans, which pivot for access, or base cabinets may have shelves that pull out, swing to the side, allowing deeper shelves to be pulled out to accessible locations. While it’s the hardest to access, the least expensive solution is to simply have deep shelves or a simple lazy-susan (the revolving shelves). If you have an L-shaped kitchen or an island with a peninsula configuration, the doors can be placed on either side for easy accessibility.

Don’t forget the space between the upper and lower cabinets. If you have more than enough counter space, the space between the upper and lower cabinets (even in the corners) can have louvered doors (rolling doors) that can hide appliances or the space can be filled with open wine racks, leaving half the counter displayed for normal purposes.

Cabinets come in all sizes. Base cabinets come in all widths from 3 inches up and depths from 12 inches to 24 inches and larger, so they can fit all kinds of needs. The 9-inch and 12-inch bottom extractors for bottles and soda cans are wonderfully efficient for filling tighter spaces. There are lower cabinets with drawers for trash and/or recycling, or with lift-up shelves for a Kitchenaid Mixmaster appliance. A 12-inch-deep cabinet at the end of an island can be used for cookbooks or designed to store wine. Don’t forget full-height pantries, which may have shelves, pull-out drawers, door hardware for spices, or other specialty storage. Both the lower and upper cabinets can be decoratively opened to store wine, books, glassware and more. An 18″ or 24″ base could have a built-in small wine/soda cooler. There are cabinets with 6″ high drawers or open shelves that can fit under the upper cabinets to provide storage for smaller items. The base cabinets can also have glass doors and elegant faces, which can be used to display specialty dishes. Kitchen cabinets have gotten very clever to offer maximum efficiency in minimum space.

Home Kitchen

Bathroom Vs. Kitchen – Where should I start for home renovations?

When it comes to potential home renovations, there are all kinds of possibilities available to you. The question is, where do you start with potential home renovations and which ones are high on the list of renovations you’d like to see happen first in your home?

Two of the most popular home renovations to consider starting are the humble kitchen renovation and the prospect of renovating your bathroom. Does this sound like something you might consider? Before you contact professionals who specialize in kitchen and/or bathroom renovations for Mornington Peninsula homes, take some time to decide which of these renovation ideas to start with first.

What if I want to renovate my kitchen?

Thinking of starting your home transformation with a good kitchen renovation? This can be a piece of cake. All you need to do is determine what type of kitchen design you want for your home. That may mean going with a modern design, or it could be an older one that makes more sense for the style of home you have. Of course, trying new colors can also bring beauty and life to your kitchen! Once you’ve worked out your overall plan, you can start with the actual changes you’d like to see.

Don’t forget to consider all the little things that you might also want to change in your kitchen. That includes changing the countertops and flooring, painting the cabinets new colors, or even installing a whole new lighting system for maximum visibility while cooking great meals for the family.

What if I want to renovate my bathroom?

If you decide to go for a simple bathroom renovation, there are plenty of possibilities here too! Most bathroom renovations start by ripping out old countertops, sinks, and flooring. Then consider new options, such as replacing certain parts of your shower or tub with a completely new configuration that can provide a completely different look.

As you explore what your bathroom will look like after the renovations are complete, just keep one important detail in mind: Your bathroom probably won’t be usable while the renovations take place, so make sure your spare bath (if you have one) Be stocked with your bathroom essentials so you can use it while your master bathroom is undergoing a renovation.

When all is said and done, all that is left for you to do is move all your toiletries into your newly renovated bathroom and enjoy the new additions.

It’s that easy!

Armed with just a few ideas and a renovation budget, you can easily have kitchen or bathroom renovation professionals in Mornington Peninsula homes helping you make your kitchen or bathroom look and feel like new. Once you know where you’d like to start with your renovations, let your team of experts know so you can get started on your home renovation right away.

Home Kitchen

water damaged venetian plaster

If you have detected a problem with wet Venetian plaster, you will first need to locate where the water is coming from. This is because while it would be easier to fix the wet plaster problem, if you don’t find the source of the water, the problem will return. So you need to locate where the water is coming from and repair it before you can move on to plaster damage.

Why a leak might have occurred

If you’re having trouble finding the source of your leak, here are the most common places leaks occur. For example, plumbing leaks are quite common and obviously need to be fixed by a professional. It may be that the pipes have burst and need fixing. Whatever it is, get a professional right away and that will fix the leak.

Another type of leak that is quite common is a roof leak. This is especially true if you have an older house, as over time the roof will weaken. In this type of damage, it is the ceiling that suffers the most and usually presents damage due to detachment of paint or collapse of the ceiling.

If you notice water coming through the walls, it is most likely moving towards the exterior masonry wall. Basically, an exterior masonry wall is made of brick or stone and water can get through the plaster layer and the paint is likely to bubble up. The investment layer may also begin to loosen, and the plaster will become dusty.

Finally, the cause of the leak could also be a faulty rain gutter. If there is a problem with the gutter, you will notice a leak around windows or in wood-framed walls. It can cause problems such as peeling paint or stains and will need to be dealt with immediately.

Once you know what the problem is, it’s time to understand how to prevent the problem from happening again and focus on fixing the cast. You will need a drywall compound and drywall tape. If you use drywall mud, you’ll find it really useful for filling in gaps, and as long as you smooth it on afterwards, it will give excellent results.

Finally, if you have smudges or scratches, all you have to do is wire brush the area and then wipe it clean with a damp cloth. Be sure to remove all flaking materials and paint with a stain remover. Next, add a paper drywall tape to the cracks and you’ll find that it’s much better to use two coats. In general, fixing the repairs yourself is not that difficult, but if you are having problems then it might be worth hiring a professional.